Setting up a fishing rod for the first time can feel like there are a hundred small parts and no obvious order to put them in. The good news is that the process is the same almost every time, and once you have done it twice it takes only a few minutes. A rod that is assembled correctly casts farther, tangles less, and lands more fish, so it is worth slowing down the first time through.
This guide walks through a standard spinning setup, which is the most forgiving combination for beginners. The same logic applies to spincast and baitcasting gear, with small differences noted along the way. Lay everything out on a flat surface, give yourself good light, and work through it one step at a time.
What You Will Need
Before you start, gather the basic pieces so you are not hunting for parts halfway through:
- A two-piece or one-piece spinning rod
- A spinning reel sized to match the rod (a 2500 or 3000 size is a sensible all-around choice)
- A spool of monofilament line in 6 to 10 pound test for general freshwater use
- A small selection of hooks, split-shot weights, and a bobber or two
- Scissors or nail clippers for trimming line
If your rod and reel were sold as a combo, the reel is already matched to the rod and you can skip the sizing question entirely.
Step 1: Assemble the Rod Blank
If you have a two-piece rod, start by joining the two halves. The thinner top section is the tip, and the thicker bottom section is the butt, which holds the handle and reel seat.
- Line up the two sections so the line guides (the round rings along the rod) all face the same direction.
- Push the sections together firmly with a slight twisting motion until they seat fully. They should feel snug, not loose.
- Sight down the rod from the butt end and confirm every guide is in a perfectly straight line. Misaligned guides hurt casting and accuracy.
A one-piece rod skips this step. Either way, double-check the guides are aligned before moving on, because everything after this depends on the line running cleanly through them.
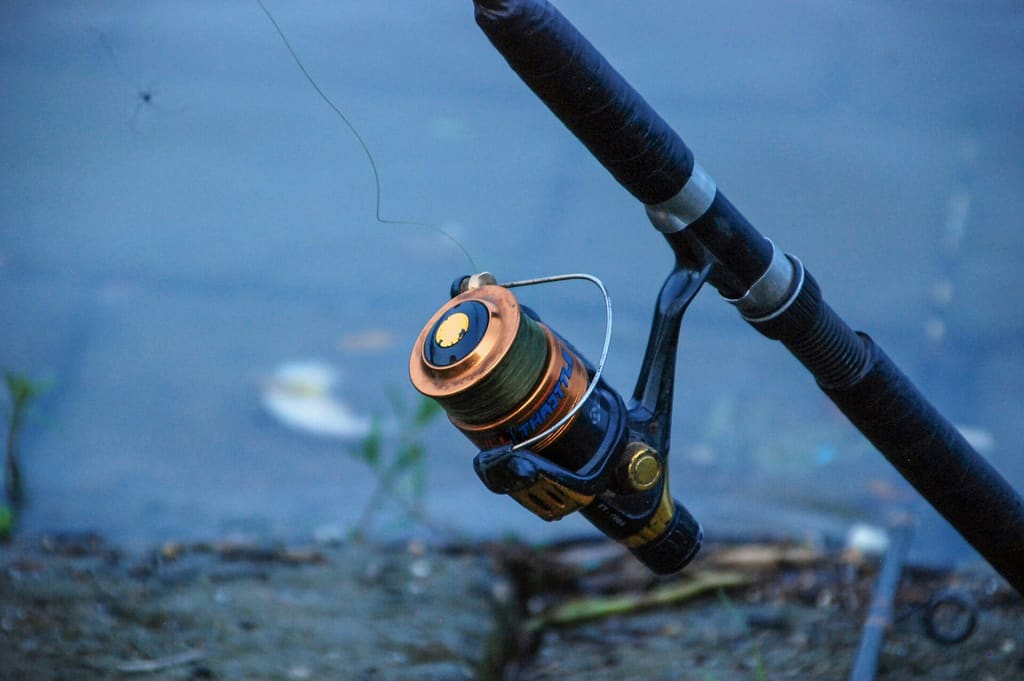
Step 2: Attach the Reel
The reel mounts to the reel seat, the slotted hardware near the bottom of the handle.
- Loosen the reel seat by turning the locking nut until the seat opens up.
- Slide the reel foot into the seat so it sits flush.
- Tighten the locking nut by hand until the reel is firm and does not wobble. Snug is enough; you do not need tools.
For a spinning reel, it hangs underneath the rod. For a baitcaster or spincast reel, it sits on top. Once it is locked in, give the reel a gentle wiggle to confirm it will not shift while you fish.
Step 3: Spool the Line onto the Reel
This is the step beginners get wrong most often, and bad spooling leads to twisted line and constant tangles.
- Open the bail, the metal arm on the spinning reel, by flipping it up.
- Tie the line to the reel spool with an arbor knot, then snug it down and close the bail.
- Lay the filler spool of new line flat on the floor with the label facing up. The line should come off the spool in the same direction the reel rotates.
- Hold the line lightly between your fingers a couple of feet above the reel to keep tension, and turn the reel handle steadily.
- Stop when the line sits about one-eighth inch below the lip of the reel spool. Overfilling causes the line to spill off in loops.
Every ten or fifteen turns, let the line go slack for a moment. If it twists into loops on its own, flip the filler spool over and continue. That simple check prevents most line-twist headaches later.
Step 4: Thread the Line Through the Guides
With the reel spooled, run the line up the rod.
- Pull a few feet of line off the reel with the bail open.
- Starting at the guide nearest the reel, thread the line through each guide in order, all the way to the tip.
- Do not skip a guide. A skipped guide is hard to spot and will ruin your casting and put extra strain on the rod.
Once the line reaches the rod tip, pull an arm’s length of slack through so you have room to tie on terminal tackle.
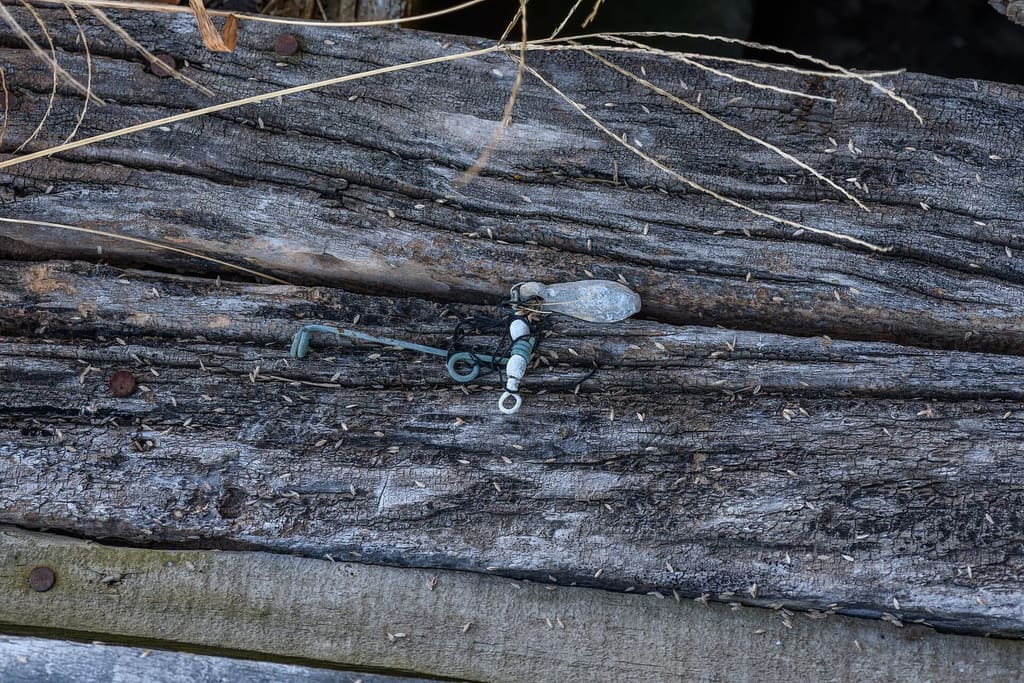
Step 5: Tie On Your Hook or Lure
Now connect your hook, lure, or swivel using a reliable knot. The improved clinch knot is a great first knot because it is simple and strong.
- Pass the line through the eye of the hook, then double back and make five or six wraps around the standing line.
- Bring the tag end back through the small loop just above the eye, then through the big loop you just created.
- Wet the knot with a little water or saliva to reduce friction, then pull it tight slowly.
- Trim the tag end close, leaving about an eighth of an inch.
Wetting the knot before tightening matters more than it sounds. A dry knot heats up from friction as it cinches and can lose a noticeable amount of its strength.
Step 6: Set the Drag
The drag is the system that lets line slip out under pressure so a strong fish does not snap your line. On a spinning reel it is the dial on top of the spool.
- Tighten or loosen the dial so that when you pull the line by hand it gives way with firm, steady resistance, not so loose it slips constantly and not so tight it feels locked.
- A common starting point is to set the drag to roughly a quarter to a third of your line’s breaking strength.
- You can fine-tune it after you hook your first fish, but starting in the right range protects your line from the first run.
Step 7: Final Checks Before You Cast
Run through a quick mental checklist before your first cast:
- Guides aligned and line threaded through every one
- Reel locked tight in the seat
- Knot tied, wetted, and trimmed
- Drag set to firm resistance
- Bail closed (open it again only when you are ready to cast)
Make a short practice cast in open space first. A casting plug or an old hook with the point cut off is perfect for practice so you can confirm everything moves freely without risking a snag or a hooked finger.
Final Thoughts
A correctly set up rod is the foundation of an enjoyable day on the water, and the routine becomes second nature fast. Assemble the blank, mount and spool the reel, thread the guides, tie a solid knot, and set the drag, then check your work before the first cast. Take your time the first few times, and within a trip or two you will be rigging up without even thinking about it, leaving you free to focus on finding fish.


.jpg)